
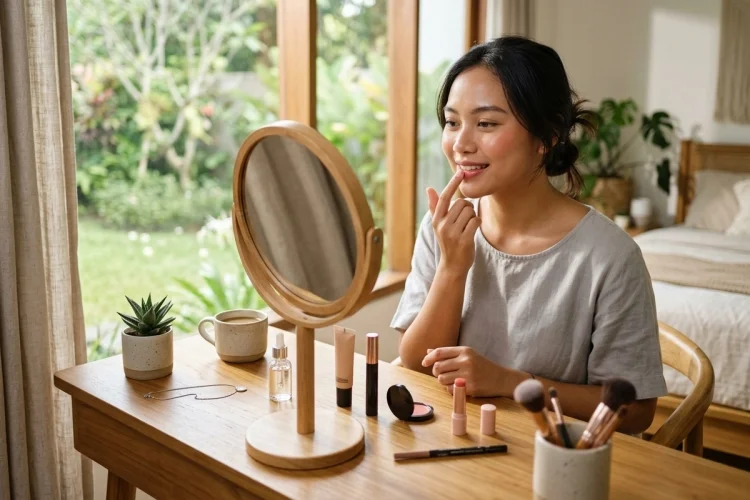
A natural everyday makeup look should make getting ready easier, not turn your morning into a complicated beauty competition. You do not need fifteen products, advanced blending skills, or an hour in front of the mirror to look fresh and polished.
The key is to focus on the areas that create the biggest visual difference: hydrated skin, an even complexion, defined brows, awake-looking eyes, and a little color on the cheeks and lips. Everything else is optional.
Learning how to create a natural everyday makeup look in ten minutes also requires a realistic system. Your products should be easy to reach, simple to blend, and suitable for your skin type.
A lightweight base may work well for dry or normal skin, while someone with oily or acne-prone skin may prefer oil-free, non-comedogenic formulas.
Once you understand the order and timing, this quick makeup routine can work for the office, university, casual meetings, or ordinary days when you simply want to feel more put together.
1. Prepare Your Skin in the First Minute
Natural makeup looks best when the skin underneath feels comfortable. Heavy layers cannot fully hide dry patches, excess oil, or product buildup, so start with basic skin preparation.
If your face already feels clean in the morning, you may only need a gentle rinse. Follow with a lightweight moisturizer that suits your skin. Give it a few seconds to settle before applying makeup.
During the daytime, apply sunscreen after your other skincare products and underneath makeup. The American Academy of Dermatology recommends broad-spectrum, water-resistant sunscreen with SPF 30 or higher for exposed skin.
Do not spend several minutes waiting between every layer. Use thin amounts and gently press the products into your skin. While they settle, you can arrange the makeup items you will use next.
2. Create Light, Targeted Coverage
For a natural finish, you usually do not need full-coverage foundation across your entire face. A skin tint, tinted moisturizer, light foundation, or small amount of concealer may be enough.
Begin around the center of your face, where redness and uneven tone are often more visible. Blend the product outward with clean fingers, a damp sponge, or a brush. Using less product near the hairline and jaw helps the base look more like skin.
If you have oily areas, avoid adding extra foundation simply to control shine. You can apply a thin base first and use a small amount of powder later.
People with acne-prone skin may want products labeled “non-comedogenic,” “non-acnegenic,” or “won’t clog pores.” The American Academy of Dermatology recommends these labels when choosing makeup and skincare that is less likely to contribute to breakouts.
The goal is not to erase every freckle, mark, or natural variation. It is to make the overall complexion appear a little more even.
3. Conceal Only Where You Need It
Targeted concealer saves time and usually looks more natural than applying a thick layer everywhere.
Use a small dot under the eyes, around the nose, or directly on noticeable blemishes. Let the product sit for several seconds before blending so you do not immediately move all the coverage away.
For the under-eye area, concentrate the concealer near the inner corner, where shadows are often most noticeable. Blend the edges rather than covering the entire space below the eye with a large triangle.
When concealing a blemish, gently tap instead of rubbing. A small brush can provide more precision, but a clean fingertip works well when you are in a hurry.
Choose a shade close to your skin tone for spots and redness. A very bright concealer may highlight the area instead of making it less noticeable.
4. Define Your Brows in One Minute
Brows give the face structure, even when the rest of the makeup is minimal. Fortunately, they do not need to be perfectly drawn or identical.
Brush the hairs upward and outward with a spoolie. This step alone may make your brows look fuller and more organized.
Fill only the obvious gaps with a brow pencil, powder, or tinted gel. Use short, light strokes that follow the direction of your natural hair rather than drawing one solid line.
A tinted brow gel is especially useful for a ten-minute makeup routine because it adds light color and holds the hairs in place at the same time. Clear gel works well when your brows are already full.
Avoid trying to completely redesign your brow shape during a busy morning. Follow what you naturally have and focus on balance rather than perfection.
5. Make Your Eyes Look More Awake
You do not need a complicated eyeshadow palette for everyday makeup. One neutral shadow, a soft eyeliner, and mascara can define the eyes in two minutes.
Sweep a beige, soft brown, taupe, or peach-toned shadow across the eyelid. A matte or lightly satin formula is usually easier to wear during the day than intense glitter.
For subtle definition, press a brown or dark gray pencil close to the upper lash line. You can soften it with a small brush or fingertip so the line does not look too sharp.
Finish with one coat of mascara, focusing on the roots of the upper lashes. You may skip the lower lashes for a softer result and to reduce the chance of smudging.
Keep eye products and applicators clean, and never share mascara, eyeliner, or other eye cosmetics. The FDA warns that sharing eye makeup can transfer germs, while contaminated applicators can contribute to infection or eye injury.
Stop using eye cosmetics if you develop an infection or inflammation around the eye, and discard the products used during that period.
6. Add Soft Color to the Cheeks and Lips
A little color can make the entire face appear more lively, especially after using foundation or concealer.
Cream blush is a practical choice because it can be applied quickly with the fingers. Place a small amount on the upper part of your cheeks and blend toward the temples.
Start with less than you think you need. It is easier to add another layer than remove a large patch of color.
Peach, rose, berry, or warm pink shades can all look natural when used lightly. The most flattering choice depends on your skin tone, undertone, and personal preference rather than one universal rule.
For the lips, use tinted balm, sheer lipstick, lip stain, or a neutral gloss. A product close to your natural lip color will look polished without requiring precise application.
You can also tap a small amount of the same cream blush onto your lips if the product is specifically labeled as safe for lip use. Always follow the intended-use information on the packaging, particularly around the eyes and mouth.
7. Set the Makeup Without Making It Heavy
Use your final minute to check the overall balance rather than adding several new products.
If your skin becomes oily, press a small amount of translucent powder onto the forehead, nose, and chin. Avoid covering the entire face unless you genuinely need it, because too much powder can make a fresh base appear flat or dry.
People with dry skin may prefer to skip powder or use it only around the nose. A hydrating mist can help the layers look more blended, although it is optional.
Check the jawline, hairline, brows, mascara, and lipstick. Blend any obvious edges and remove accidental smudges with a clean cotton swab.
Keep regularly used tools clean, and replace products that develop an unusual smell, color, texture, or visible contamination.
The FDA notes that cosmetic shelf life depends partly on storage and handling, and products can become unsafe before a printed date when they are improperly stored or contaminated.
Make the Routine Faster With Better Organization
The easiest way to complete your makeup in ten minutes is to remove unnecessary decisions.
Keep your everyday products together in one small bag or tray. You should not need to search through several drawers for mascara while the clock is running.
Choose multipurpose items whenever they genuinely save time. A tinted moisturizer can combine light coverage and hydration, while a cream color product may work on both cheeks and lips when approved for both areas.
Practice the same product order for several mornings. Repetition helps you learn how much product you need and which tools work fastest.
Your basic order can remain simple: skin preparation, complexion, concealer, brows, eyes, cheeks, lips, and setting. Once this sequence becomes familiar, finishing within ten minutes feels much more realistic.
Remove Your Makeup at the End of the Day
A quick morning routine should be followed by a simple evening cleanse.
Remove makeup before sleeping, especially around the eyes. Follow with a gentle cleanser and moisturizer suited to your skin. Avoid scrubbing aggressively, because friction can leave the skin feeling irritated.
Wash reusable brushes and sponges regularly according to the manufacturer’s care instructions. Let them dry completely in a clean area instead of storing them while damp.
Persistent breakouts, itching, swelling, burning, or rashes may indicate that a product does not suit your skin. Stop using the suspected item and seek professional advice when symptoms are severe, recurring, or slow to improve.
Creating a natural everyday makeup look in ten minutes is mainly about choosing a few reliable products and applying them where they matter most.
Start with comfortable skin, use light coverage, conceal selectively, and define your brows and lashes without aiming for perfection. Add a soft cheek and lip color, then set only the areas that need it.
Keeping your everyday products organized will make the process faster and reduce unnecessary decisions during busy mornings. Tomorrow, place your essential products in one small bag and try the routine with a timer.
Notice which steps make the biggest difference and skip anything that does not. Natural makeup should help you feel fresh and confident – not late, frustrated, or hidden under heavy layers.